
You have just received your roll of synthetic grass, and the temptation is strong to lay it directly on the ground to finish quickly. However, the result may disappoint: visible wrinkles, edges that lift at the first gust of wind, visible seams. A few simple steps, done in the right order, can radically change the durability and final appearance of your artificial lawn.
Resting time before fixing: the reflex that most tutorials forget
Have you ever noticed that your synthetic grass, once rolled out, has ripples in the direction of the roll? This is normal. The material has been compressed during transport and storage.
Further reading : Trends and Tips for Successful Real Estate Projects in 2024
Before any cutting or gluing, let the grass rest flat for two to three hours. This relaxation time allows the fibers and backing to expand and regain their natural shape. On concrete or tiles, this step prevents tensions that cause wrinkles once the seams are glued.
If you skip this phase, you risk fixing grass that is still under tension. With the heat of the following days, the material will continue to move and create bumps that are impossible to correct without removing everything. This advice applies equally to a balcony or a garden. Knowing how to fix synthetic grass starts with this initial patience.
Recommended read : How to Watch Football Streaming Legally: Practical Guide and Tips
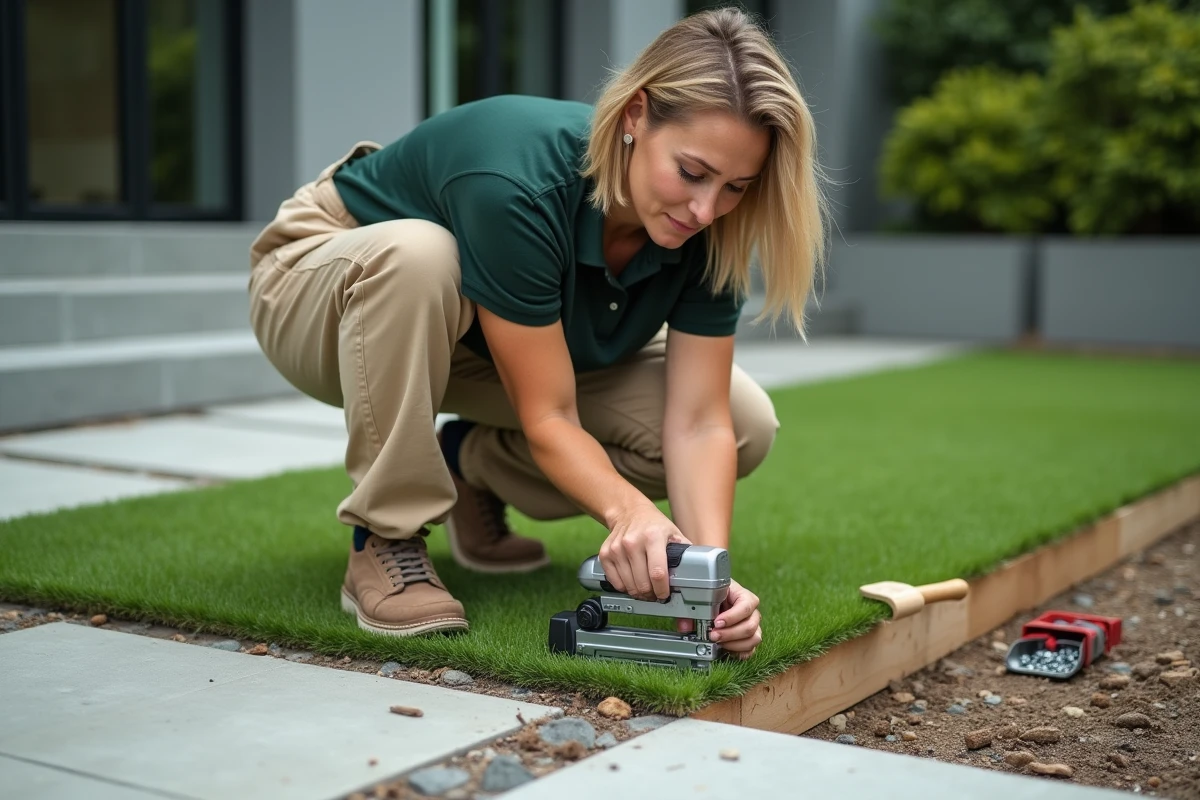
Glue and seam tape: choose the right product according to sun exposure
The seams between two strips of synthetic grass are the weak point of any installation. A poorly chosen glue degrades in a few months, and the joint becomes visible or even comes apart.
Abandon neoprene glue in exposed outdoor areas
Standard neoprene glues lose their adhesion more quickly when subjected to alternating heat and bad weather. For areas that are very exposed to the sun (south-facing terrace, poolside), prefer a UV and frost-resistant outdoor polyurethane glue.
Pre-glued seam tapes also represent a reliable alternative. They simplify installation and offer more uniform adhesion than glue applied manually, especially for a homeowner installing synthetic grass for the first time.
Make a clean seam
Here are the points to check to ensure your seams remain invisible:
- Place the two strips edge to edge, fibers oriented in the same direction, without overlap or visible gap between them.
- Fold back the edges, slide the glued seam tape underneath, then press firmly on each side onto the tape, ensuring no fibers are caught in the glue.
- Weight down the seam with heavy objects (sandbags, concrete blocks) during the drying time indicated by the glue manufacturer.
A poorly weighted seam during drying will lift at the first rain. This simple action makes all the difference between an amateur result and a professional finish.
Fixing synthetic grass on soft ground: soil and sand
On soil or sand, the fixing does not rely on gluing but on stakes or fixing nails driven into the ground. Before reaching this point, the base must be impeccable.
An uneven ground will show through the synthetic grass. Every dip or bump in the terrain will be reflected on the surface. Excavate the soil by a few centimeters, compact it, and then lay a weed barrier geotextile over the entire area. This fabric prevents weeds from breaking through without blocking water drainage.
Then plant the stakes every twenty to thirty centimeters around the perimeter of the grass. Drive them into the geotextile and the soil below. For large areas, add a few fixings in the center of the strips to prevent any movement in strong winds.

Synthetic grass on terrace: the overheating trap in summer
Installing synthetic grass on a concrete slab or tiles seems simpler than in the ground. No excavation, no geotextile. The surface is already flat and stable.
The problem lies elsewhere: in the middle of summer, the surface temperature of synthetic grass laid directly on a slab can become very high. The backing absorbs the heat from the concrete, and the surface becomes uncomfortable underfoot, even warping.
Create an air gap under the grass
The solution adopted by professional installers is to insert spacers or ventilated battens between the slab and the grass. A few millimeters of air gap are enough to significantly reduce the surface temperature and limit the risk of backing deformation.
This detail is especially relevant for south or west-facing balconies and terraces exposed to direct sunlight for several hours. On a shaded terrace, direct installation remains entirely viable.
Maintenance and brushing after installation
Once the synthetic grass is fixed, one last action determines the final appearance: brush the fibers against the grain with a stiff-bristle broom. This operation straightens the strands crushed by rolling and gives the grass its lush appearance.
Afterward, occasional brushing and rinsing with clear water are sufficient to maintain the appearance of your artificial lawn. Remove dead leaves and debris before they decompose between the fibers.
A well-laid and properly fixed synthetic grass can last for several years without major intervention. The time spent preparing the ground, allowing the material to relax, and caring for the seams pays off in peace of mind later on.